CQG Integrated Client version 2015 offers sophisticated auto execution based on the CQG backtesting environment. Basically, all of your trading systems can be set to auto execution with only a few mouse clicks. Keep in mind that your trading system might be modified a little bit to run as an auto execution system.

On this chart we are running the SuperTemplate trading system (installed on your system by default) on a one-minute DAX futures chart using the following parameters:

The quickest way to launch a trading system in auto trade mode is to right-click the P&L curve and select Autotrade.
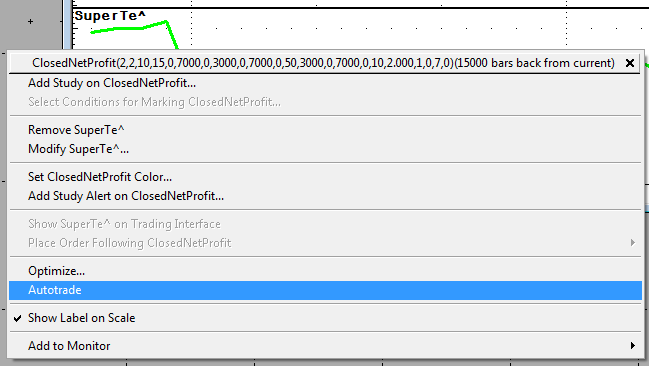
This puts most parameters used on the chart directly into the Auto Trade View:

All settings can also be changed here. The main important selection is the account with which to execute the trades. If everything is set, just check On and you are ready to auto trade!

The Auto Trade View title bar is highlighted according to the current state of the Gateway and data.
- Green = Connected to Gateway and no delays
- Orange = Data is delayed
- Red = Disconnected from Gateway (a message is also displayed)
Execution parameters, such as pricing, sizing, timing, and order type instructions, are specified within the trade system.
In order to use auto trade, you must:
- have an active trading account;
- be enabled for backtesting;
- be enabled for auto trading;
- be experienced with trade system development; and
- have a repository of fully operational trade systems.
If you have numerous, highly complex trade systems, you may require additional CQG IC systems due to computational and data intensity.
The auto trade parameters are as follows:
| Name | Description |
|---|---|
| Name | Type an alert name, which appears as a filter on the Orders and Positions window and with the ATS study. This is the first step in the process of creating an auto trade; other fields are active only after a name has been assigned to the auto trade. |
| Account | Select an account for the automated trades to be executed in. You can use either a live or a simulated account. This column is not active if you are not logged on to trade. |
| Trading System | Click this field to expose the drop-down arrow, then click that arrow to open the Trade System menu. The menu includes the trade system formulas you have created with Formula Builder. Right-click this field to edit the trade system parameters. |
| Issue | Type a symbol. If the symbol does not identify a month or year, the spot contract is used. |
| Preferences | Indicates the chart interval and recalculation settings. Double-click or right-click this field to change chart preferences. |
| Actions | Double-click this field to set sound and email order fill notifications. Right-click this field to set or clear actions. |
| Remember History | Click this field, then click yes or no to activate or deactivate external trades. yes = the Total Position value is calculated using the trades entered in the external trades window. no (default) = auto trading begins with a flat position. |
| External Trades | Click this field to open the External Trades window and manually enter trades that should be included in the calculations for this auto trade. Used in conjunction with Remember History. You can also open this window by right-clicking anywhere on the auto trade window. |
| Rej Stop to Mkt | Select this check-box to tell the system to convert rejected stop orders to market orders, assuring timely execution of exit orders. |
| On | Click this check-box to activate the auto trade. The trade system start flat, and Remember History is set to no. To change the value of some parameters, the auto trade must be turned off. |
| Total Position | Displays the total net position of the trade system since it was initiated for auto trading. The position is reset to 0 at the start of each auto trade. If Remember History is on, then external trades are considered in this calculation. |
Trades executed will show up in the fill report and O&P windows.
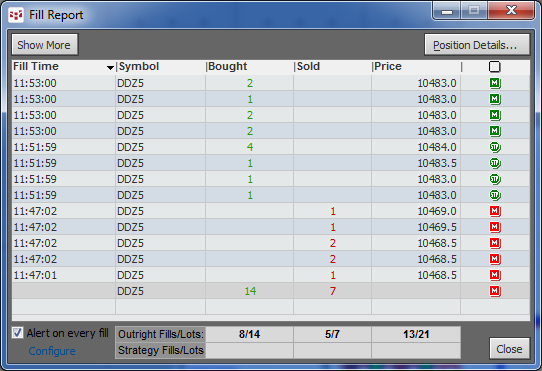
In this case, the system went short, closed the position, and went long again with seven contracts.
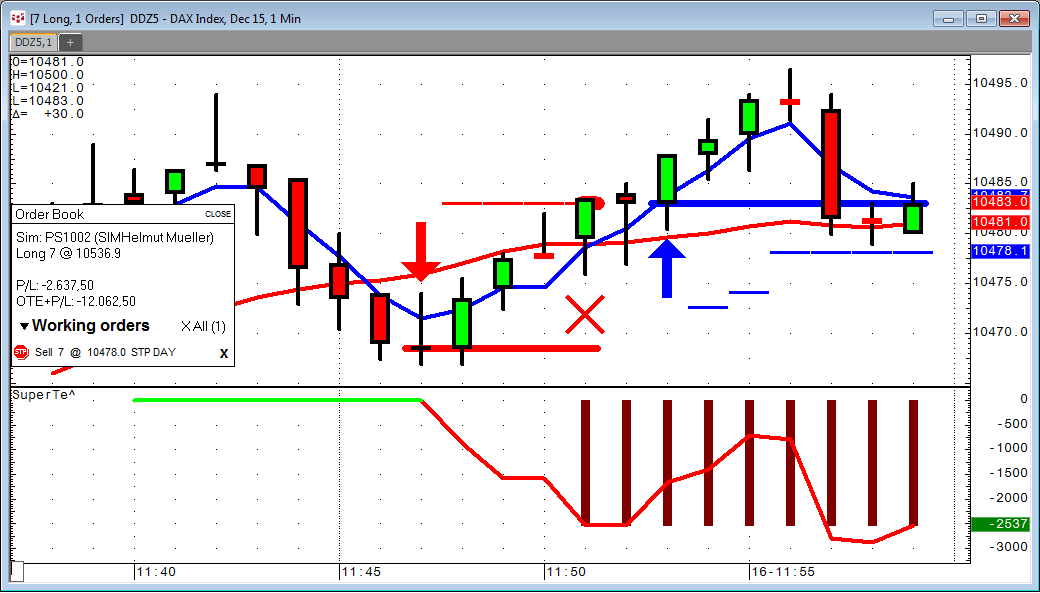
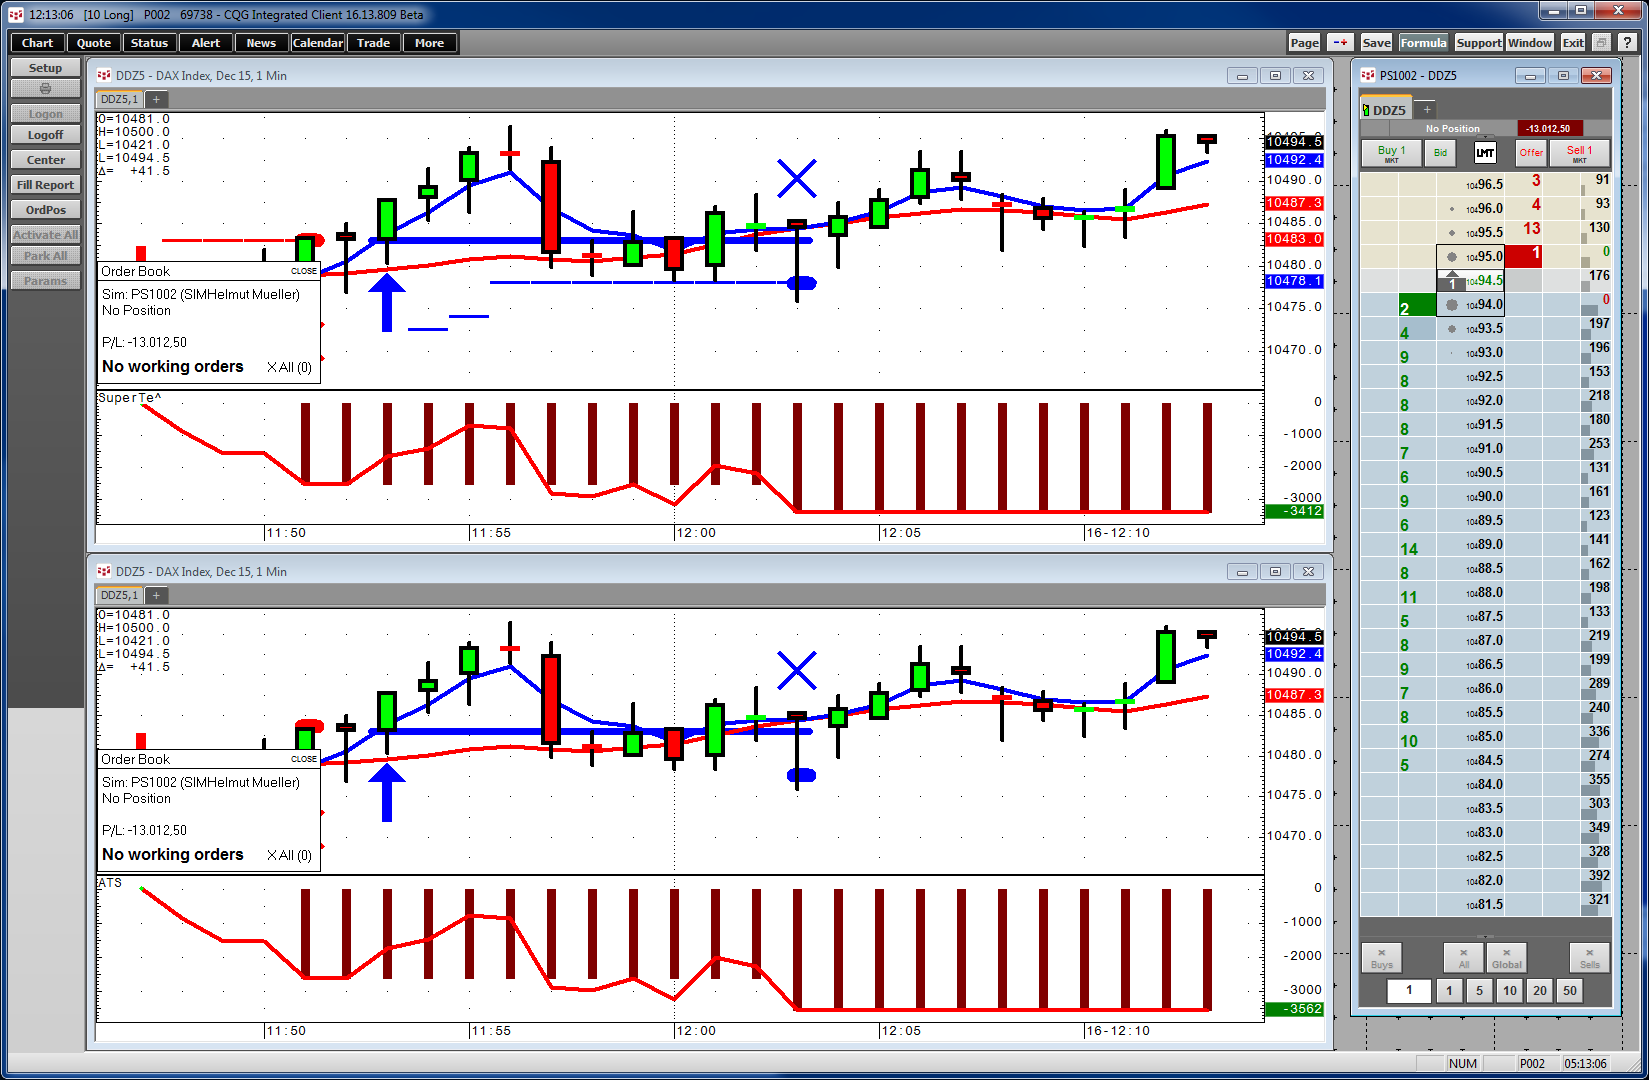
It is helpful to show the Order Book on the screen as well. In this case, it shows you the working stop calculated by the trading system.
Keep in mind that this view is still the “back testing view” and the P&L is what the back testing thinks the trading system would have made. It is helpful to add the ATS study (Auto Trading System) as well.
This study displays the potential profit and loss associated with a particular trade system, for some number of bars back or for a certain period of time.
The ATS study parameters are as follows:
| Parameter | Description |
|---|---|
| Display | Opens a sub-window with these display parameters:
|
| AutoTrader | Select the AutoTrader system to use. |
| TradeCount Method | Select entry or exit based. |
| TimeRange | Opens a sub-window where you select the number of bars or time range for the analysis. |
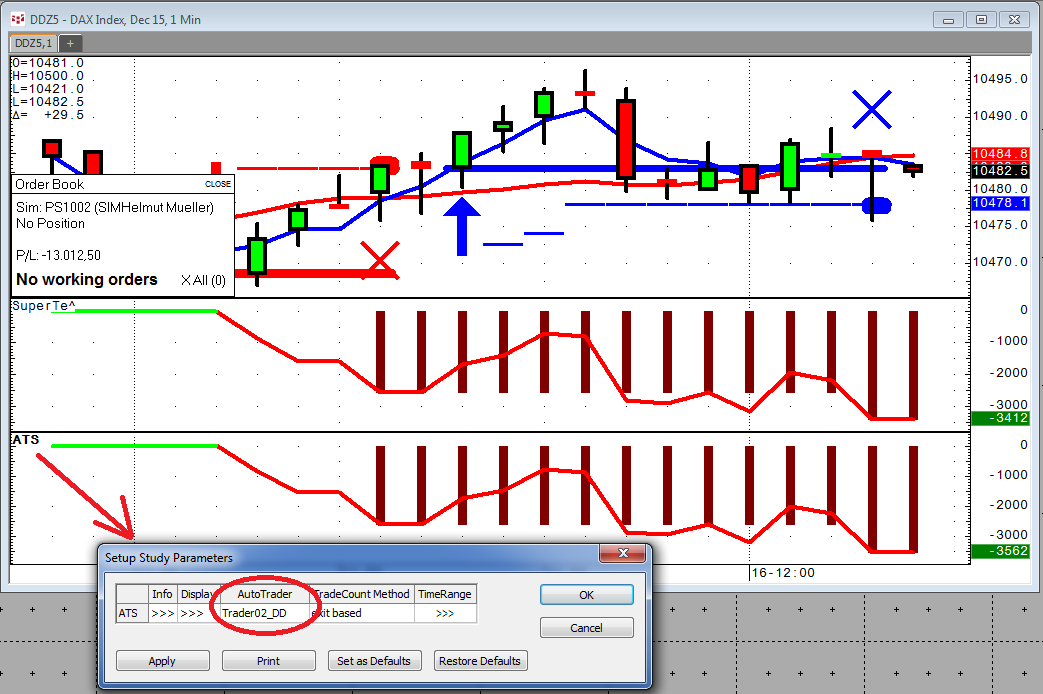
The study needs to be set to the instance of AutoTrader it supposed to follow.
ATS now shows what really happened on the trades, including slippage, etc.!
These numbers should be close to, but not always matching, the backtesting results.
Personally, I prefer two separate charts on my screen. One with back testing and the other one with the ATS study on it. This way I can see the trades on the ATS study better than in a mixed view, but this is a personal preference.
If back testing and real trading do not really match, there is a huge danger that the trading system is not correctly configured for auto trading. Some shortcuts and habits that are “good enough” for simple backtesting will immediately explode if it comes to auto trading. We will have a look into the most common mistakes on auto trading systems and backtesting in part 2.